While there is increasing demand from valve end-users for low emission sealing systems, it is essential that the valve stem continues to move smoothly and efficiently. The frictional load of the stem packing has a conflicting effect on these two requirements, so valve and valve packing manufacturers are challenged with respect to the prediction and improvement of packing behaviour in a valve.
By Hubert Lejeune
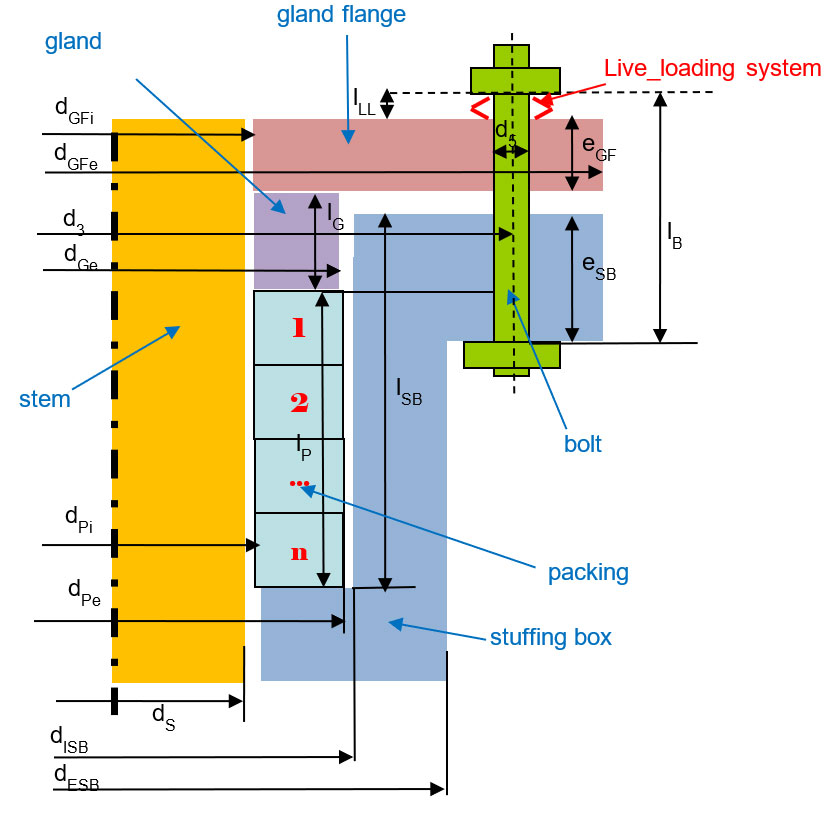
The definition of a global design method for the optimization of packings with regard to sealing performance and friction forces is needed to meet both low emissions and energy efficiency requirements. But no standardized method for packing calcula-tion nor packing full characterization (mechanical, friction, sealing performance vs. packing load.) exists in Europe, in a similar manner to that for bolted flange joints and associated gasket detailed in EN1591-1 and EN13555. Therefore, Cetim (The Technical Center for the French Mechanical Industry), in collaboration with the European Sealing Association (ESA) and the Fluid Sealing Association (FSA) has initiated the development of a tool to predict the initial packing tightening force required to reach certain characteristics in relation to friction and sealing performance.
Model and associated tool
A simplified 2-dimensional asymmetric stuffing box packing geometry is considered as shown in Figure 1, except for the gland flange mechanical integrity check where 2-bolt non-axisymmetric configurations are considered.
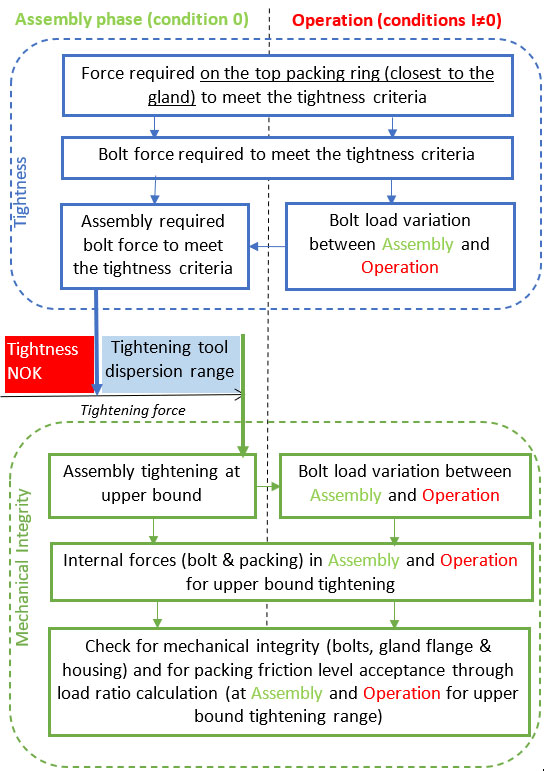
Figure 2 shows the global calculation sequence. An “.xls” spreadsheet has been developed to apply the calculation. The calculation process involves two major steps.
1. Calculation of the required initial bolt load to fulfil the tightness criteria in all the situations (assembly and operation) and definition of the tightening range from the tool dispersion
2. A check on the mechanical integrity of the bolt and the gland flange and check of packing friction level for an initial bolt force corresponding to the upper limit of the tightening range
Gland deformations (bending) are neglected, and the axial bolt load is assumed to be fully transferred to the first ring in contact with the gland. A pure axial displacement is considered for the gland without any alignment problem. The mechanical model accounts for deformation and stiffness of the packing and the live loading-system. No deformation is considered for the gland, stuffing box or bolts.
The bolt load variations between the assembly phase and operation conditions are calculated taking into account the differential axial thermal expansion in the packing assembly and the packing rings creep/relaxation behaviour. The use of a live-loading system can be introduced in this calculation.
Packing characterization
The following packing material parameters can be handled by the calculation model:
For sealing behaviour: the required initial axial contact pressure on the packing top surface at tightening QA(L) and during operation Qsmin(L) to meet the tightness class L.
For mechanical behaviour:
• The relaxation (or creep) coefficient
• The axial to radial load transmission coefficient
• The static friction coefficient at the stem/packing and housing/packing interface
• The dynamic friction coefficient at the stem/packing interface (under stem linear or rotational movement)
• The ring axial thermal expansion
• The ring load/thickness curve
• The elastic modulus of the ring at unloading
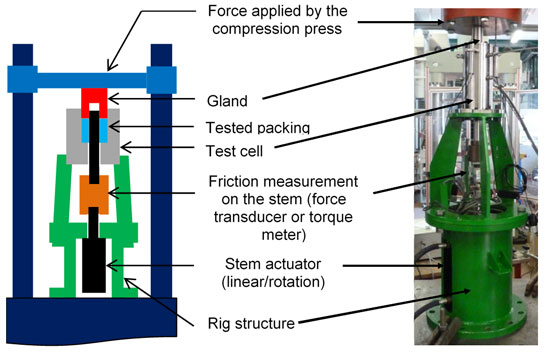
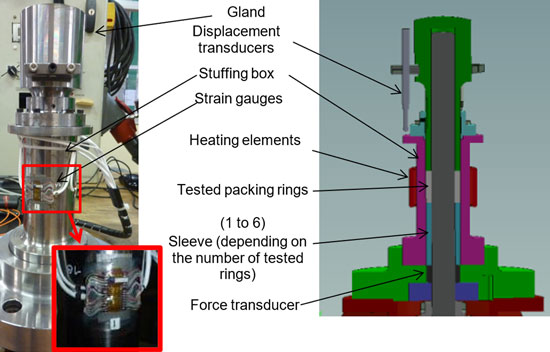
To identify these material parameters, dedicated testing facilities and procedures have been developed. As shown in Figure 3, the test bench involves the following elements:
• A stem actuator (rotary or linear)
• A friction measurement system positioned on the stem (force transducer for linear movement or torque-meter for rotational movement)
• A compression press applying the desired force sequence to the packing through the gland
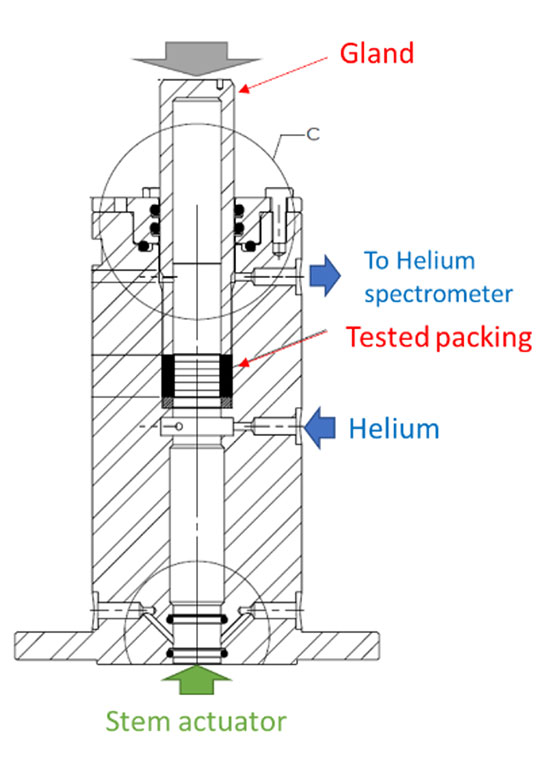
• A test cell in which the packing is positioned. Two test cells have been developed and can be installed alternatively in the test rig frame. The dimensions, clearance toler-ances and surface finish of the test cells are those defined in the test specification API622 – ‘Type Testing of Process Valve Packing for Fugitive Emissions’:
• A sealing test cell: allowing definition of the relationship between initial/residual packing load and leakage rate. (Figure 4)
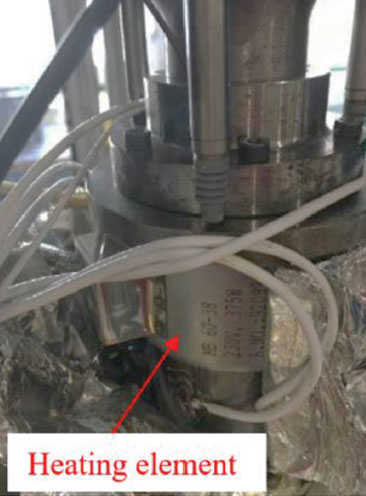
• A mechanical test cell: allowing definition of the packing mechanical behaviour parameters described above (Figure 5). Tests up to 150°C can be performed on this test cell using heating elements as shown in Figure 6.
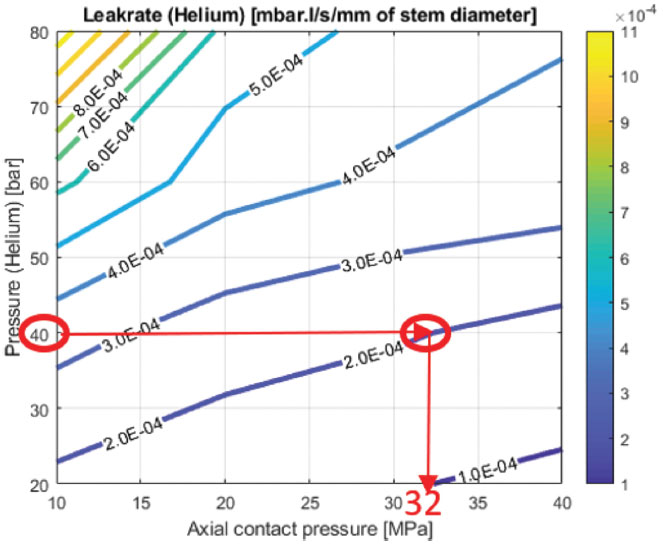
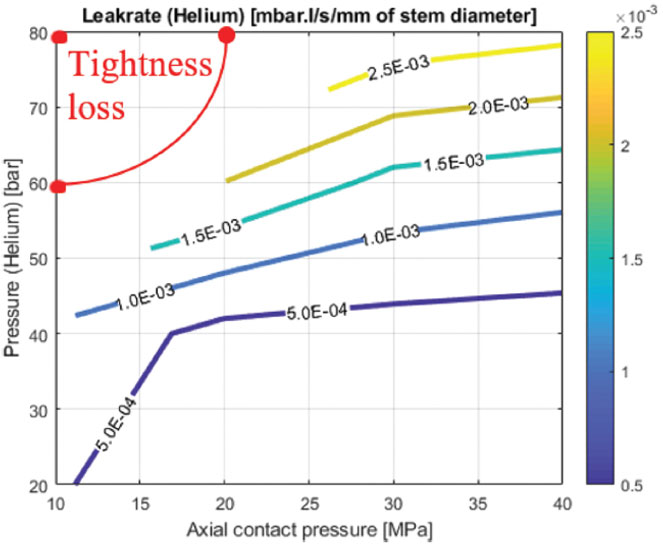
Figure 7 and Figure 8 show examples of sealing test results for two types of graphite packings (comprising 4 sealing rings and two anti-extrusion rings). From the target leakage rate (2 E-04
[mbar.l/s/mm]) and the operating fluid pressure (40 bar), the required residual axial pressure (32 MPa) can be obtained from the diagram of Figure 7 for example.
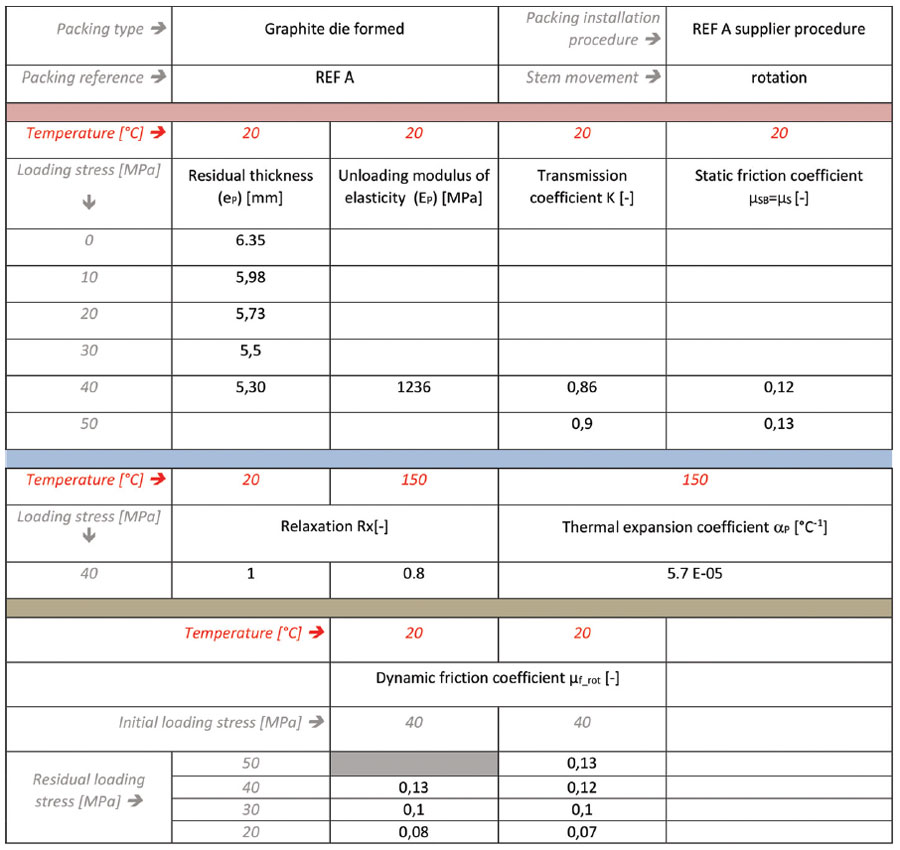
But the leakage behaviour can also be shown in tables in the same way as typical EN 13555 test results presentation. In addition to these leakage results, Figure 9 shows an example of typical test results regarding mechanical parameters.
Conclusion
Test devices to determine the leakage and mechanical parameters of a packing set have been manufactured and tested. A calculation method to determine the necessary gland load for a packing set has been developed. The next step is a validation program of the proposed method involving both Finite Element Analysis and experiments on two valves, which is currently in progress.
 About the author
Hubert is a mechanical engineer and Sealing Technologies senior expert at CETIM (Technical Center for Mechanical Industry), France. He is a member of the ESA Packings Division.


